Easy-to-make plywood shelves
I’ve made quite a few variations of these shelves over the years, for our own home, or as gifts for our family
They’re inspired by the classic Shaker ‘hanging shelves’ design — which, like all Shaker furniture, is renowned for its simplicity, utility, strength, and lightness.
They’re ideal for storing, or displaying, all sorts of small items throughout the home. They can be freestanding on cabinets or desks, or mounted on walls — or even fixed on the backs of doors.

My first version was an exact copy of the original Shaker design — but made with 12 mm birch plywood instead of solid wood
This was one of my first projects when I re-started woodworking after I retired. I made it for our son S’s first home, to store his collection of kitchen spices.
Copying the original Shakers, he hung it from hooks on his kitchen wall using a couple of Timberland leather shoe laces. These laces have been surprisingly robust, and they’ve only just been replaced.
It always feels good when I visit S and his partner, and see it still in use in their new home together!
Since then, I’ve made a few more ‘improvements’ to this classic Shaker design
-
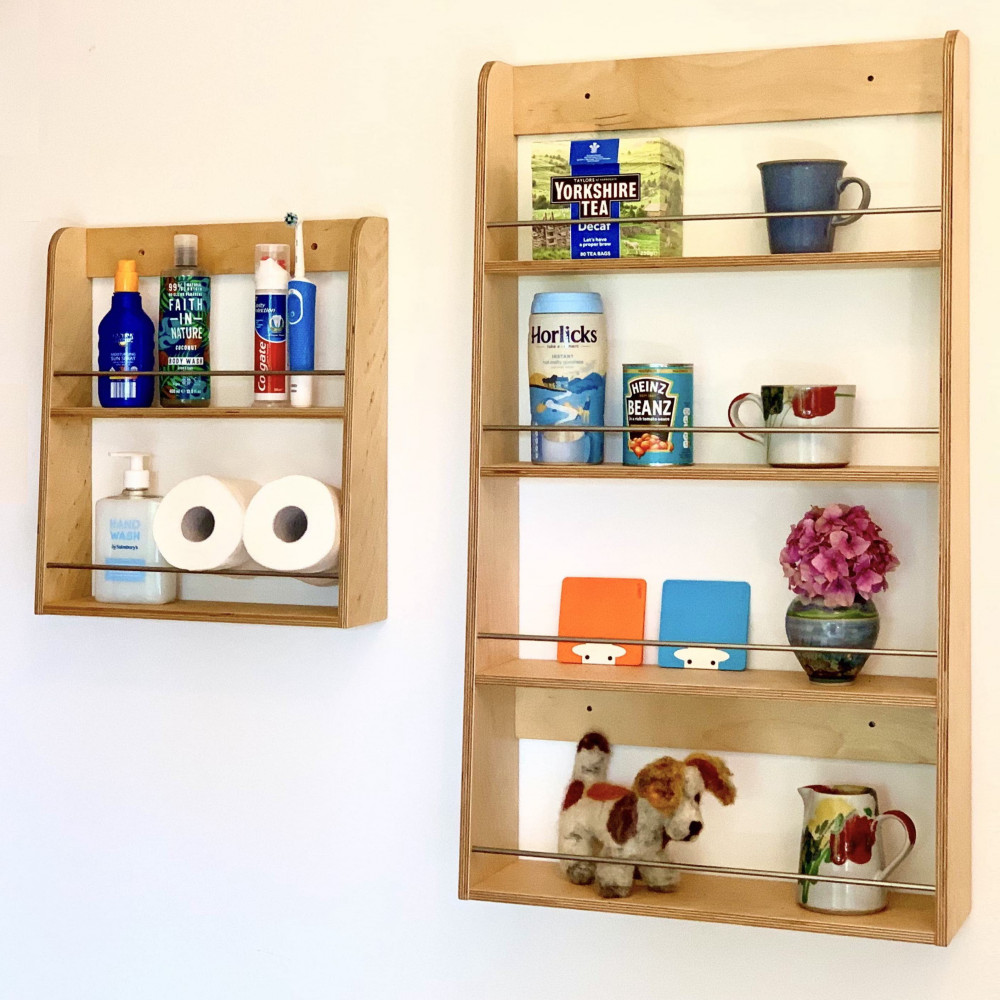
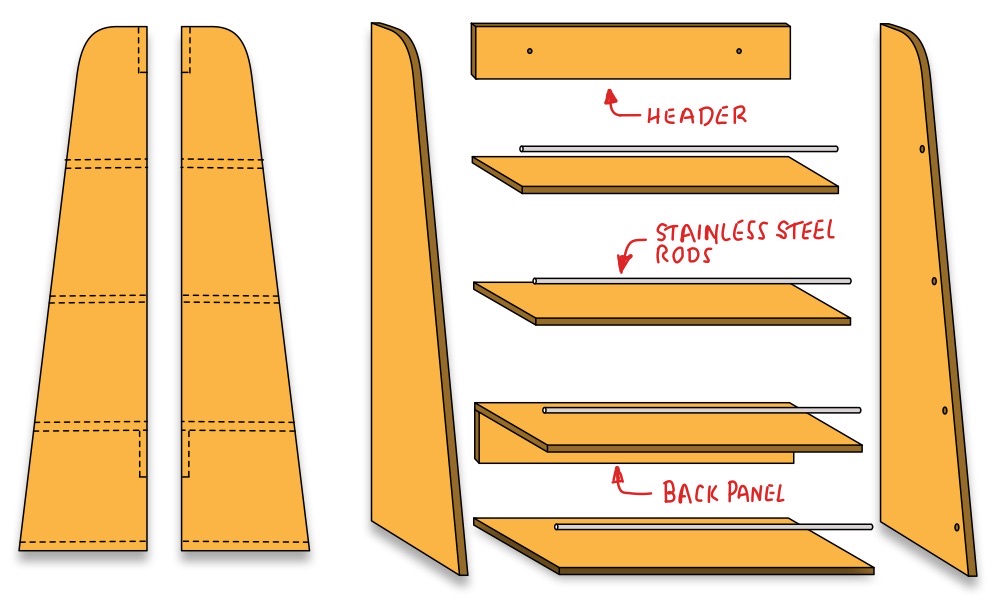
A top header panel: I added a plywood panel at the top for more strength and rigidity, and to simplify mounting with wall screws.
-
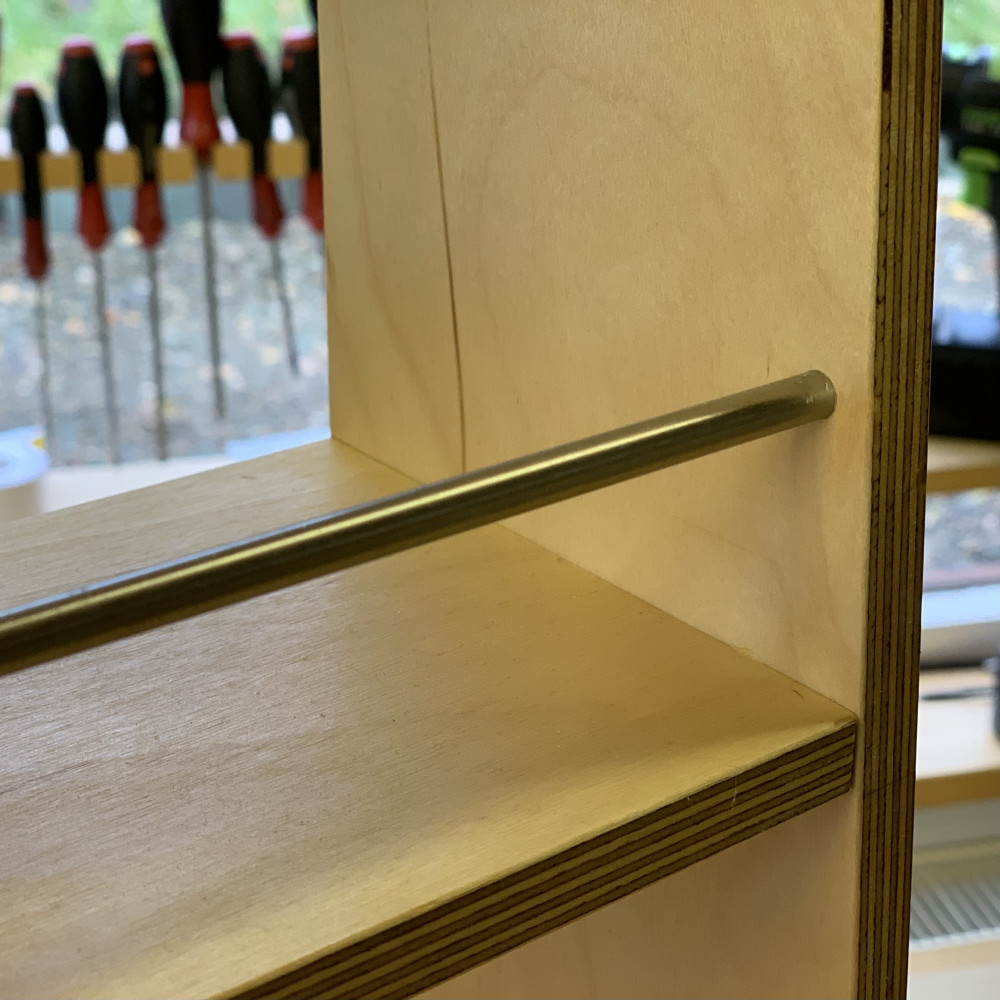
Stainless steel front rails: I fitted a 6 mm diameter stainless steel rod at the front of each shelf, to keep small items from being accidentally knocked off — especially useful when shelves are door-mounted.
-
A second back panel: For larger units with more than three shelves, I added a second strengthening panel, tucked just below the second bottom shelf.
You can design your own unit — with almost any sizes and combination of shelves
Although I’ve listed some dimensions for the two-shelf and four-shelf units (as photographed at the top of this post), their simple shape can be adjusted to suit a wide variation of sizes — from tall and shallow, to short and deep:
-
The easiest way to design your own version of these shelves is by drawing a full-size side profile on the actual plywood material.
-
Judge the position and size of each shelf by eye, using actual items, such as bottles and jars, to measure clearance widths and heights.
-
Provided there’s a smooth radius (around 50 mm) at the top, and a sloping front profile — it always seems to look good!
-
I deliberately reduce the shelf depths by about 1 mm, so that the front shelf edges are inset slightly from the side panel’s front edge.
-
To locate each end of the (optional) stainless steel rails, drill a 6 mm diameter hole, half-way through each side, and about 5 mm in from the front edge.
Update, 11 January 2022: I’m still struggling to write these notes. First it was hard to get started… then they became too long… then I split them into three posts… then I began to design new ‘card’ layouts for them… then, for other reasons, I lost motivation. I hope I’ll get it back soon!